Start rocking your reputation!

DOWNLOAD MY FREE 31-PAGE EBOOK, GET ACCESS TO THE PRIVATE FACEBOOK GROUP, + RECEIVE EMAILS WITH HYPE-FREE ADVICE TO HELP YOU GROW

How To Create Your Own Worksheets In Adobe InDesign (And Make Pro Freebies + Digital Products)

  |   Blogging Tips, Branding, Business Tips   |   37 Comments

Tutorial: how to create your own worksheets in Adobe InDesign. (Also great for making your own blog printables, planners, digital products, etc.) Includes a free InDesign worksheet file download.


Today I’m shaking in my cowgirl boots because I get to introduce you to one of my best biz pals. (Okay, just kidding, this Montana girl doesn’t wear cowgirl boots — but I am legit excited.)


Say hello to Adobe InDesign.


You can do a lot with the app — like make e-books, pamphlets, mini-mags, brochures, posters, planners, and other printables — but today I want to show you how you can use it to easily make your own pro, custom worksheets.


(That you then might want to give away as your email opt-in gift, include within blog posts, or sell for [real!] money.)


To go with this tutorial I’ve also included a free InDesign file download at the end of this post so that you can play around with a pre-made worksheet; be sure to pick that up before you go.


Oh, and if you don’t have InDesign yet? Check it out here (btw, not an affiliate link) — it’s $19.99/mo on its own or $49.99/mo if you want Photoshop, Illustrator, Lightroom, and all the other Adobe apps included.


You can also get a 30-day free trial if you want to play around with it first. Plus: it works on PC and Mac — which always makes me happy.


Let’s get started, shall we? We shall, my friends, we shall!


Here’s how to create your own worksheets in Adobe InDesign:


STEP 1: CREATE A NEW DOCUMENT


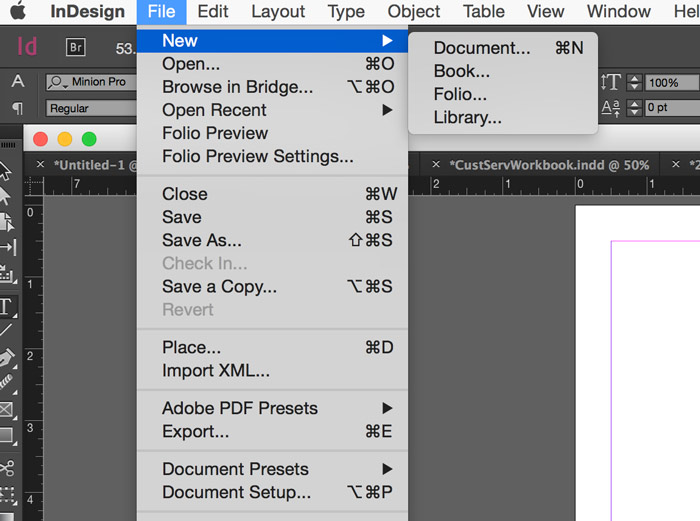
Open InDesign and choose File > New > Document.


Create a new InDesign document


STEP 2: SELECT YOUR DOCUMENT SETTINGS


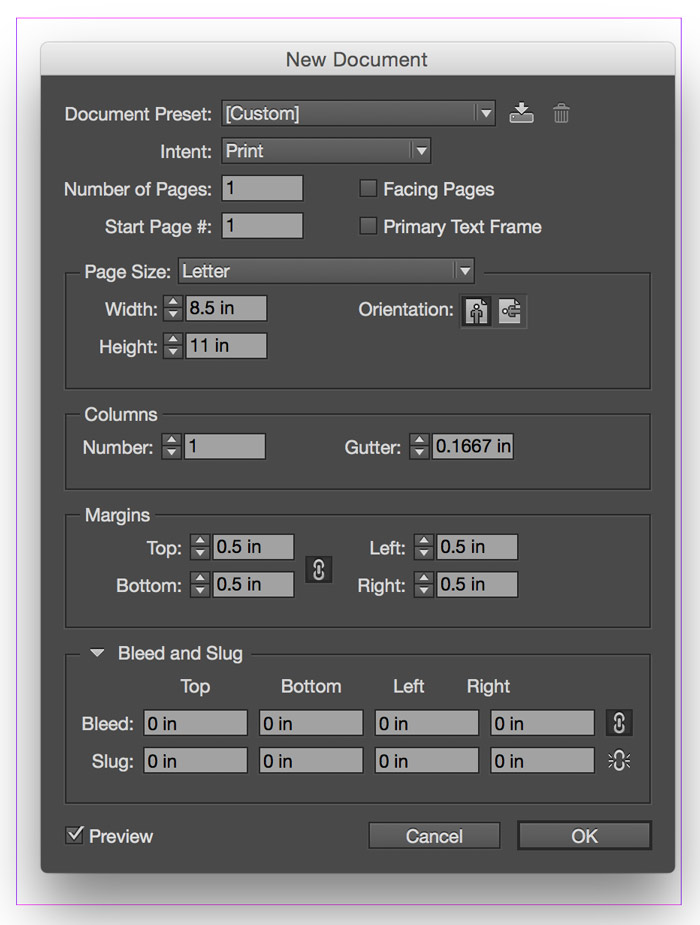
In the window that appears you will then determine your document’s settings.


If you’re a beginner, the easiest place to start is with a 1-page document that is standard letter size with 0.5 in margins. (If you have 2+ pages, be sure you deselect the ‘Facing Pages’ box.)


Select document settings


Now click ‘OK.’


STEP 3: SELECT THE TYPE TOOL + CREATE A TEXT BOX


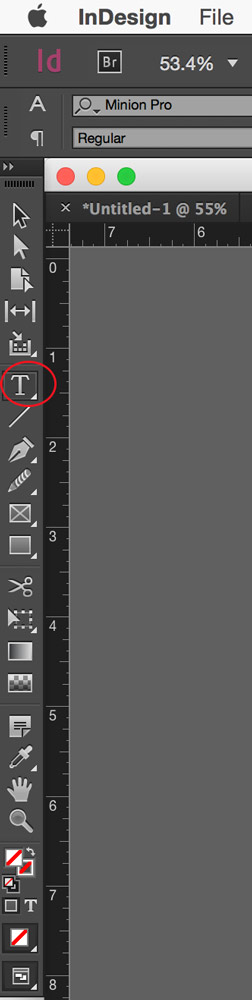
You’ve created the foundation of your worksheet! Let’s add some text by selecting the Type tool in the left-hand menu bar:


Select type tool


Simply click on your document and drag to create a text box.


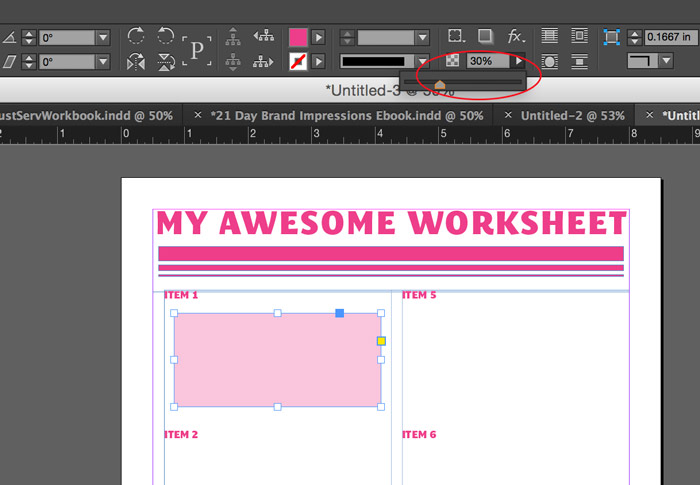
In the example below I’ve made it span from margin to margin.


Create a text box


(If you didn’t get it right with the first click and drag, just select one of those little boxes in the corners or on the edges and re-adjust.)


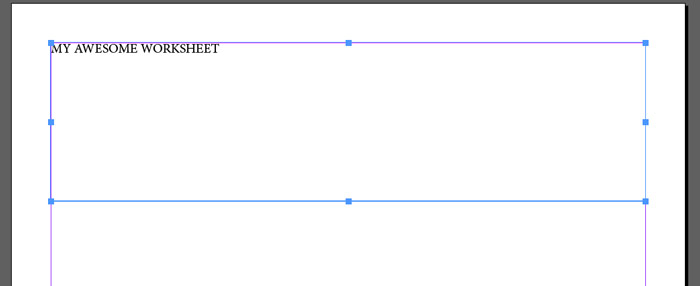
STEP 4: ADD YOUR HEADING/TITLE TYPE


Next, add your text.


(You may need to reselect the box by double-clicking or by selecting the text box and choosing the Type tool again; a cursor will appear within the box when it’s ready to type.)


Add your type


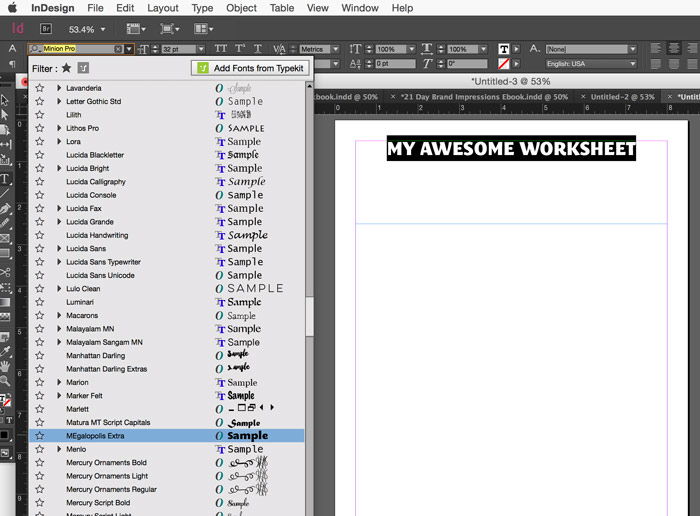
STEP 5: CUSTOMIZE YOUR TYPE


Change your font face, size, and orientation by highlighting your text with your cursor and then using the menu bar items at the top of the screen.


Modify your heading


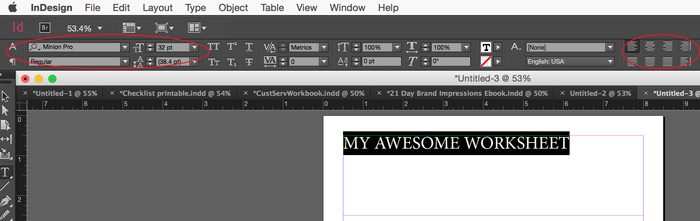
In this tutorial I’m going to use the MEgalopolis Extra font, which I’ve centered within my text box:
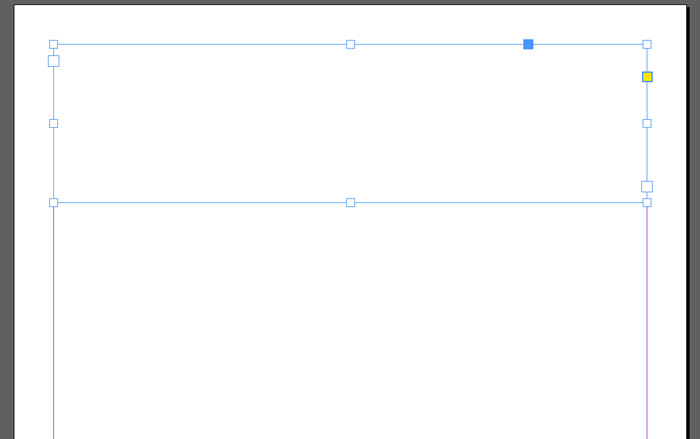
 

Customize your font


STEP 6: ADD KERNING


For this big heading I want to kern the text a bit (that means adjust the spacing between the letters). You can do this in the top menu bar where you just adjusted your font face and size, but I’m going to show you another place where you can work with your text as well.


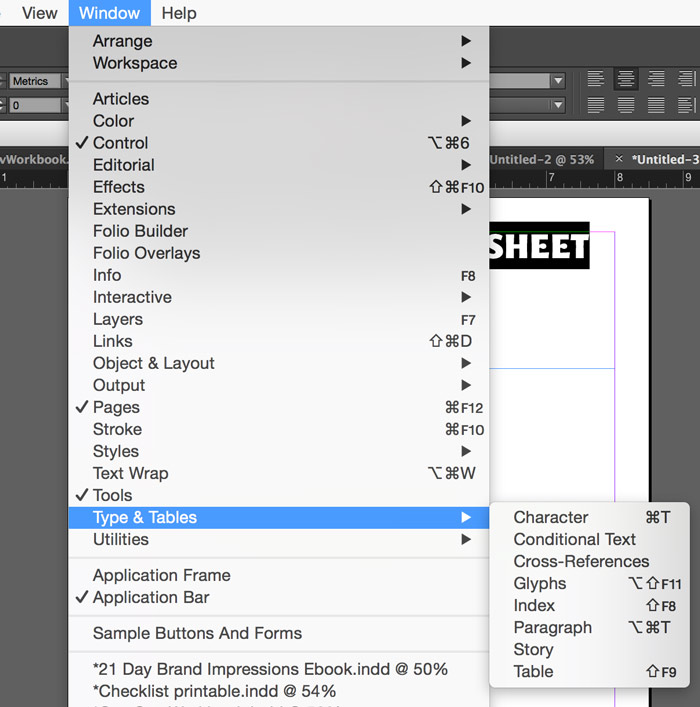
Go to Window > Type & Tables > Character:


Add kerning


A floating window will appear. Highlight your text, then in the VA box on the right (shown below with the yellow highlighted text), increase your kerning to a small degree:


Add kerning / step 2


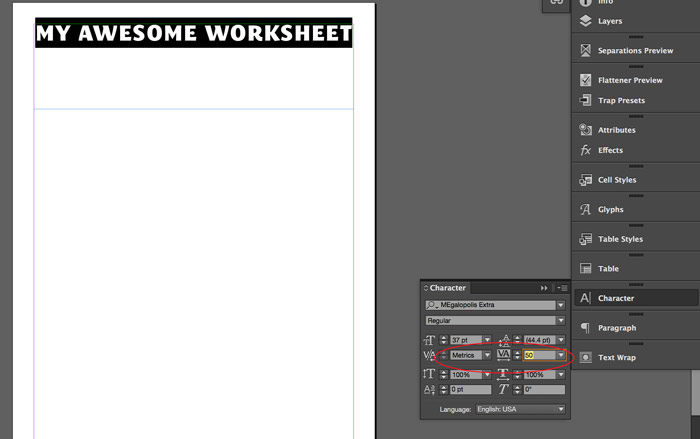
(TIP: Don’t go overboard with the kerning; letters with too much space between them end up looking funny — or close to illegible.)


STEP 7: MODIFY YOUR COLORS


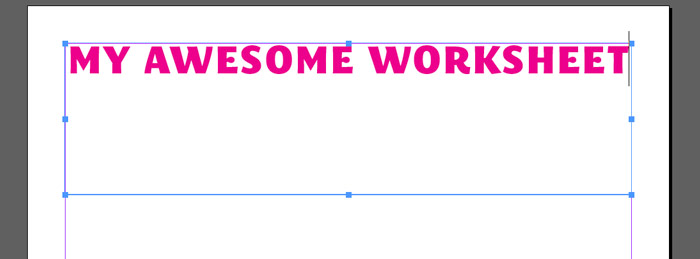
With your text still selected, you can change its color by clicking the “T” in the top menu bar and choosing one of the predetermined colors:


Modify colors


I chose a magenta shade that looks like this:


Color change


But I’d rather it wasn’t so purple, so we’re going to customize the color even further by re-highlighting the text and then double-clicking on the “T” icon in the LEFT-hand menu bar (it’s near the bottom):


Further customize colors


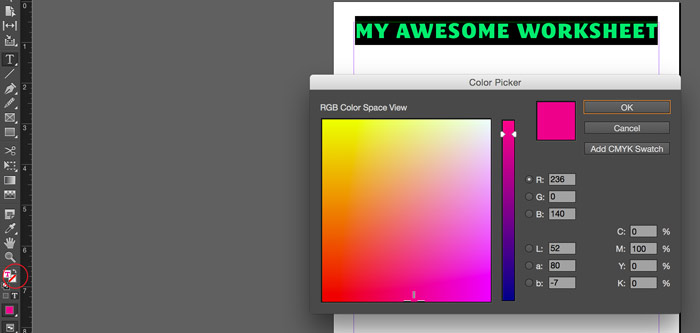
Within this window we can choose any color we desire. You can drag your mouse around until you’re happy with your color choice, or you can choose a specific color by adjusting the CMYK values on the bottom right.


Customizing colors


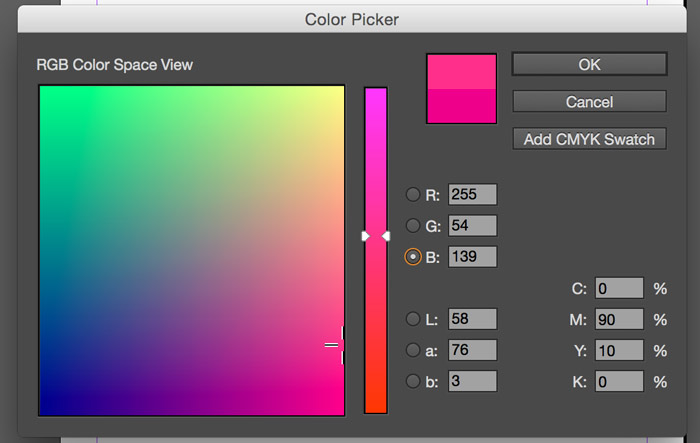
If you want to use this exact color again in your document and want InDesign to remember it, click ‘Add CMYK Swatch’ before you finish. You’ll then be able to access it in the top menu bar panel that we used to find the predetermined magenta color.


Click ‘OK’ when you’re done.


STEP 8: CREATE ANOTHER TEXT BOX WITH COLUMNS


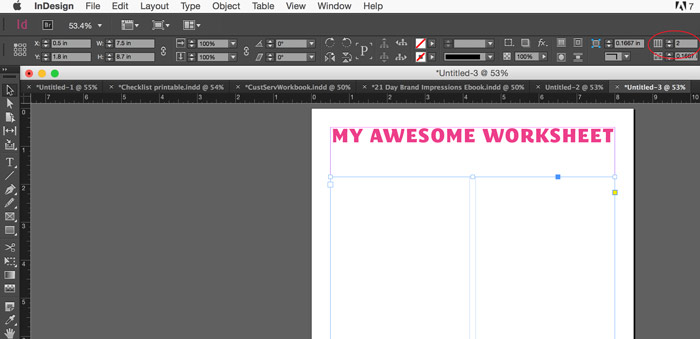
Now we can add the rest of our worksheet text. For this example you want to select the Type tool in the left-hand menu bar again and click + drag to create a text box that fills the rest of your page.


With this text box selected, click the ‘Column’ area in the top menu bar and tell InDesign that you want 2 columns instead of 1 (see red circle below):


Create another text box with columns


STEP 9: ADD TEXT TO NEW TEXT BOX


Now click within the text box and add the text you want:


Add text to column text box


STEP 10: CREATE A DECORATIVE ELEMENT


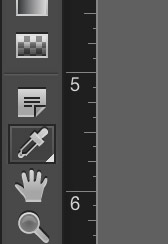
A worksheet with plain text looks boring, so let’s fix that by adding some decorative shape elements. In the left-hand menu bar, click on the rectangle/square icon:


Select rectangle shape tool


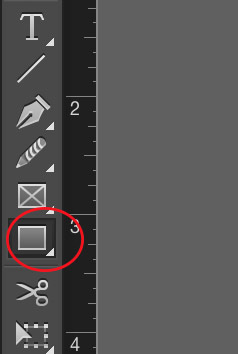
Click and drag it across your page to create a bar shape:


Create rectangle shape


Now let’s make it the same color as our text. With the shape selected, click on the eyedropper icon in the left-hand menu bar:


Select color of shape


And click on your colored text. Your shape should now look like this:


Finished decorative rectangle


Feel free to play around with it by copying and pasting the shape + readjusting the sizes:


Finish adding custom shapes


You can also make the text colors match, too:


Finish adjusting colors


STEP 11: ADD INTEREST WITH MORE SHAPE/COLOR ACCENTS


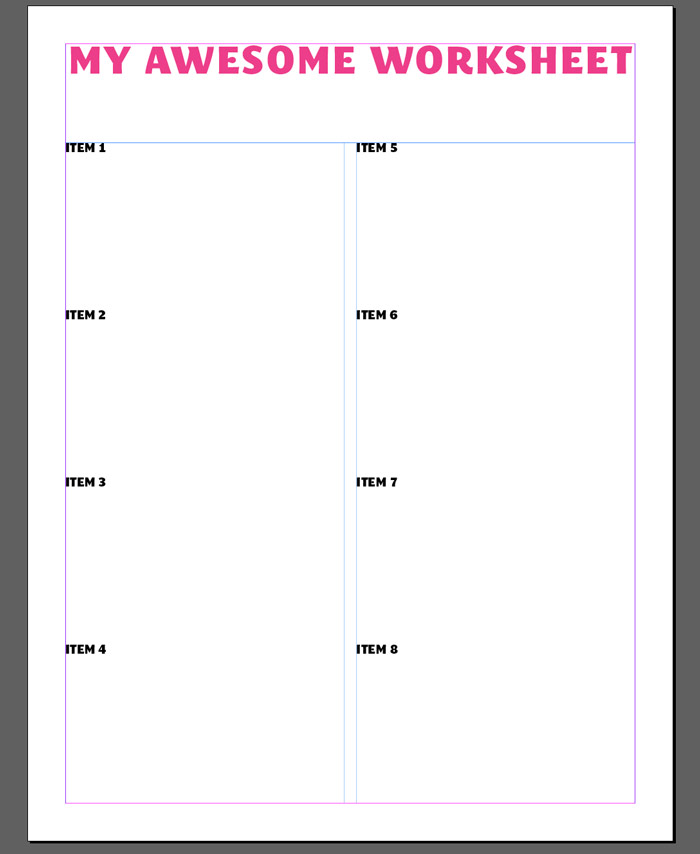
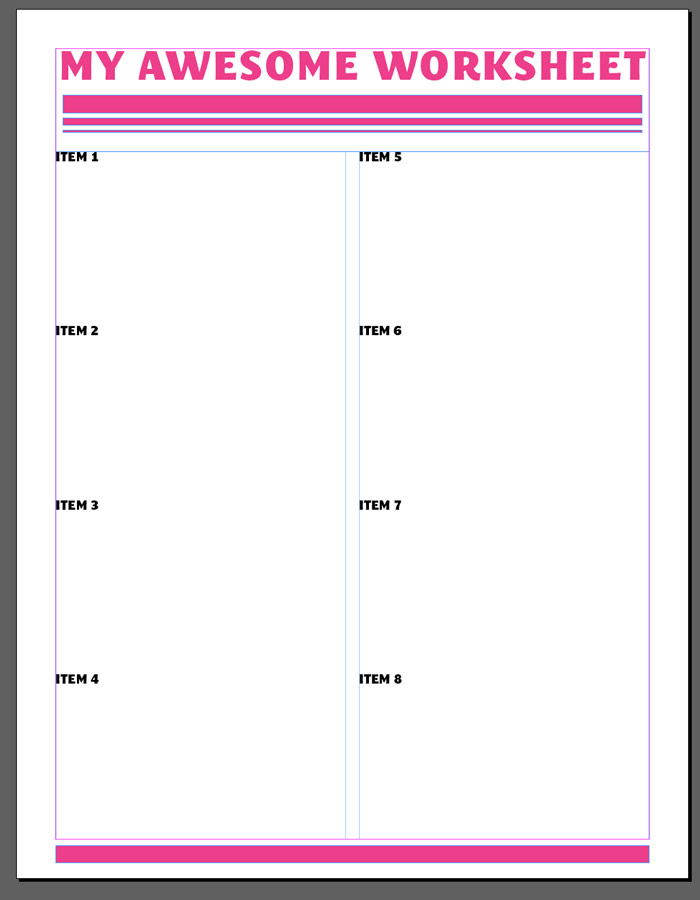
This worksheet is still looking a bit plain, so make another rectangle shape below each item:


Add interest to worksheet with color accents


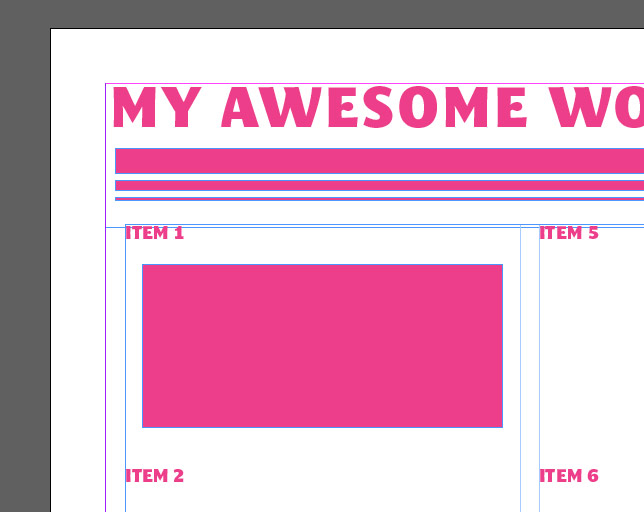
And adjust its opacity in the menu bar at the top:


Adjust opacity


You can now copy and paste this color block to appear with each item section.


STEP 12: PREVIEW YOUR DESIGN


Looking good! Next, let’s see how things will look when printed.


(This will help you get a better idea as to whether everything is lined up correctly, the whitespace is even, etc.)


Go to View > Screen Mode > Preview.


Enter preview mode


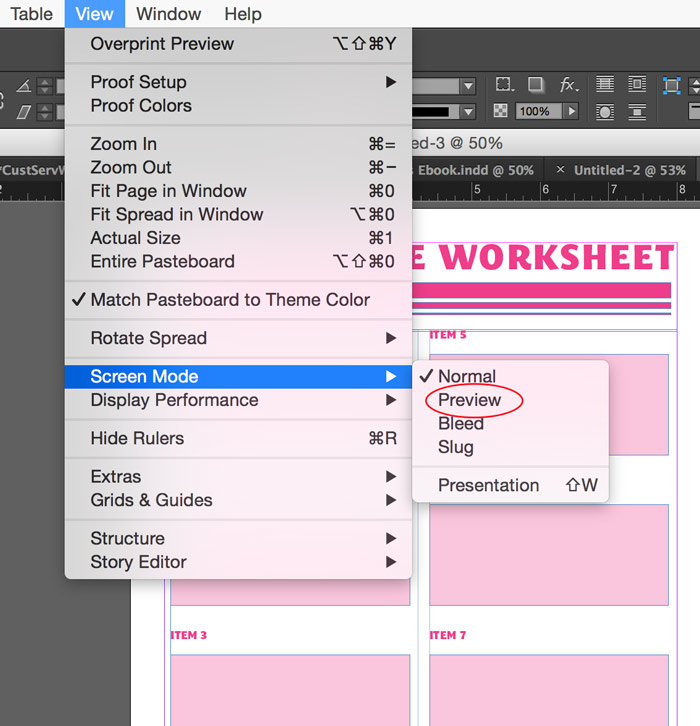
This is what you should see:


Document in preview mode


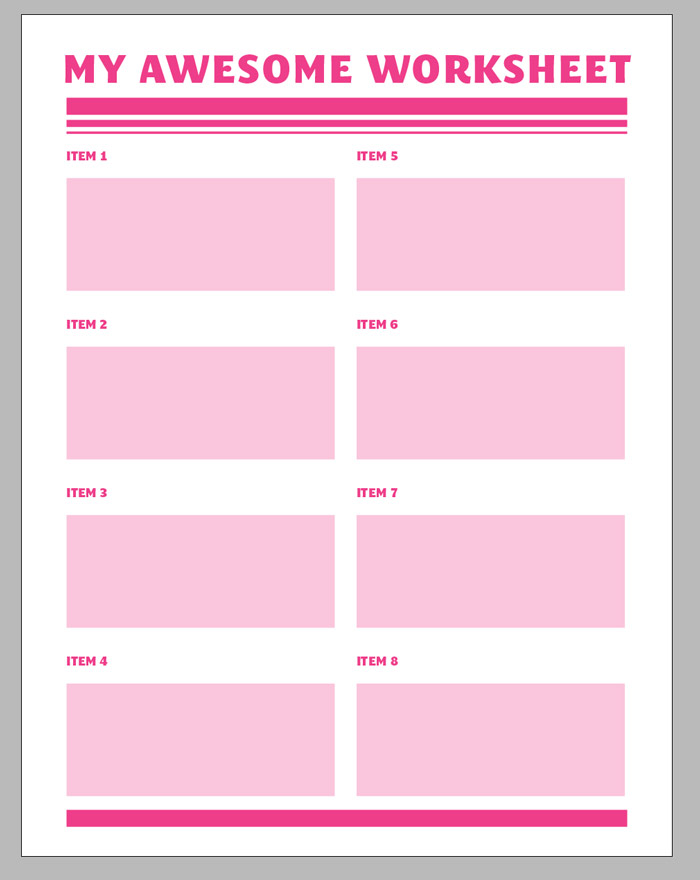
You can make adjustments to all of your items until they look clean and nicely aligned.


(To exit from this view, simply go back to View > Screen Mode and select Normal.)


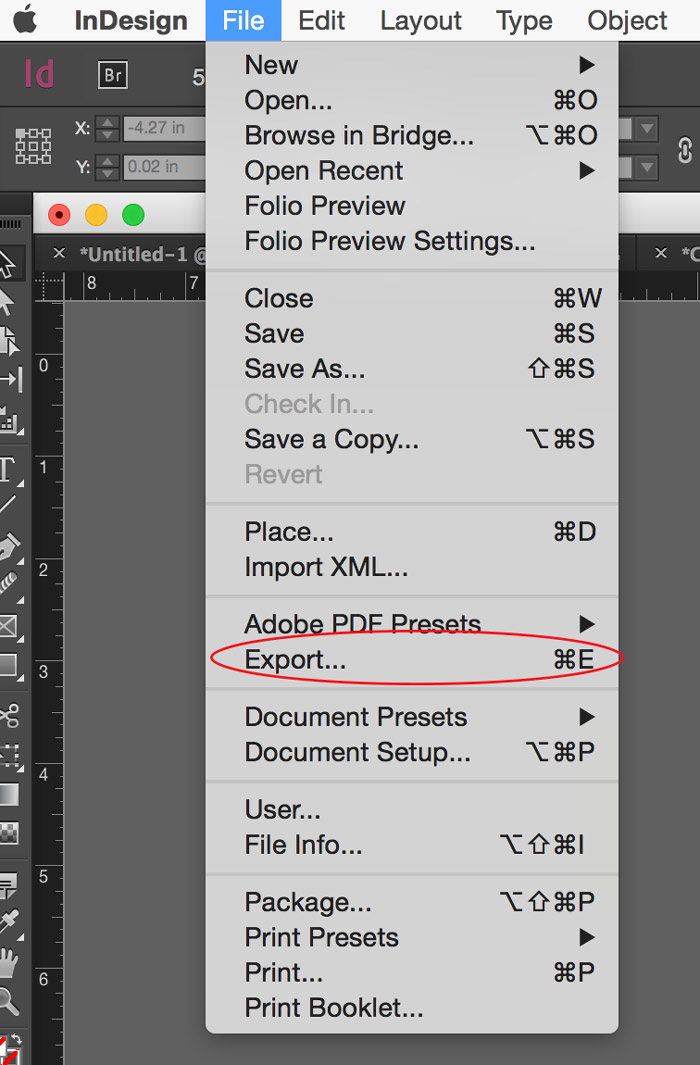
STEP 13: EXPORT (SAVE) YOUR DOCUMENT AS A PDF


If everything is as you desire it, you’re ready to save as a PDF!


Click File > Export.


Export to PDF


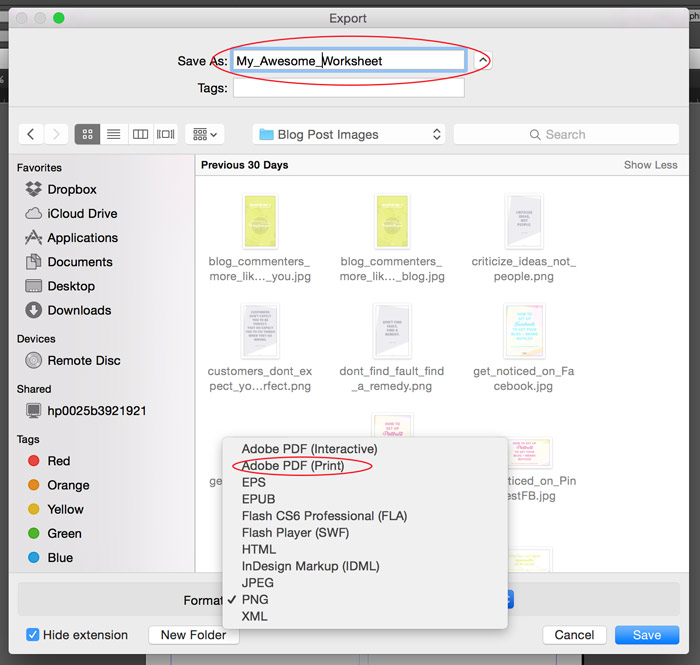
In the Export window title your PDF a cool name, then click on the Format list at the bottom and select Adobe PDF (Print).


Hit ‘Save.’


How to save as PDF


Finally, the settings dialog will appear. This is where you can determine the quality level of your PDF.


For standard digital docs that will likely be printed from a home printer, use the ‘High Quality Print’ preset.


(If this is something that you/your customers/your clients are going to take to a professional printer, select ‘Press Quality’ at a minimum.)


PDF print settings


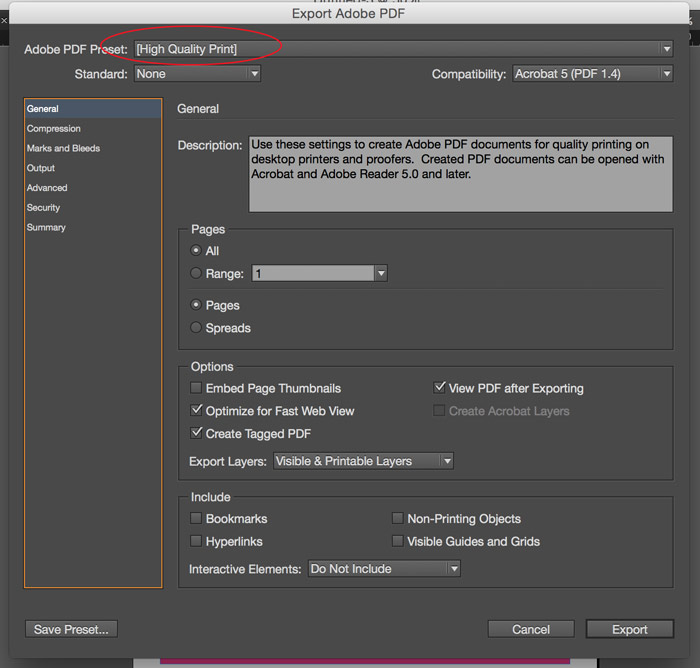
Then click ‘Export’ — and you’re done!


EXTRA: DOWNLOAD A FREE WORKSHEET TEMPLATE


I learn best if I can play with something that someone has already done, so I fancied up (that’s a term, right?) the above worksheet for you and I’m giving you the InDesign file.


Just click on the picture or link below to download it (no opt-in required):


My_Awesome_Worksheet

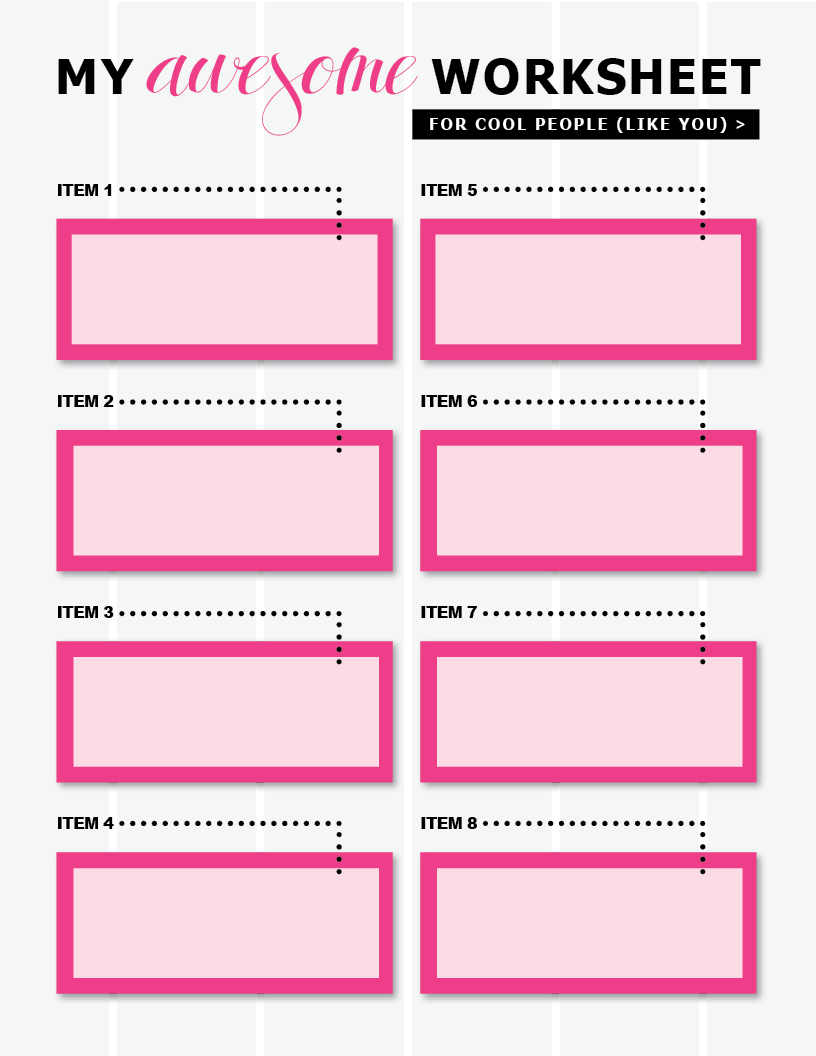
The worksheet (.indd file)

The ‘awesome’ font: Antrokas


And if you liked this post, please Pin it and/or tweet it out!


create_your_own_worksheets_CTT


What do you use to create digital products like worksheets, printables, and/or e-books? Let me know if this tutorial was helpful + hit me up with your questions in the comments below. 🙂


Erika Madden

(Chief Olyvia)


The free 21 day ecourse that creates pro online impressions for business owners!


  • AC

    Great tutorial! Are there any advantages to making a PDF with Indesign verses another program? I usually use PowerPoint (obviously not for everyone, but I know it like the back of my hand so it’s easy for me).

    • This is a great question! Unlike PowerPoint, which is intended to be for digital (screen) presentations only, InDesign is specifically made for the design layout of printed documents. So it has many more features in this regard — with PowerPoint, for example, all of the newer versions won’t export PDFs at the 300 dpi resolution necessary for printed documents (whereas InDesign will). Also InDesign allows for documents to be set up and designed where the color/photos can “bleed” off the page (aka: print up to the edge of the paper at professional printers). Plus it has many, many more features as it concerns handling multiple page documents. Because of this, it is what almost all professional magazine and book publishers use — as well as the majority of graphic designers.

      If you are familiar with PowerPoint I definitely wouldn’t discourage you from using it, but if you are wanting to regularly make print-quality documents for your blog/business (and definitely if you want to sell them) I’d encourage you to start looking into learning a program more like InDesign. To help you understand the difference, essentially it’s like using a free WordPress.com blog vs. having a fully self hosted WordPress.org blog — you can accomplish somewhat of the same thing with each (you can publish your thoughts on both), but the latter allows you to have total customization and control to a degree you just can’t get on the free WP.com platform. Does that make sense? 🙂

      If you want to start with something a little more basic than InDesign, another great alternative to get your feet wet is Apple Pages. Regina has a great vid tutorial here: https://www.youtube.com/watch?v=Y9LvuqQQ0IQ

      • AC

        Thanks Erika! It’s obvious that you’re a wealth of great knowledge!

        • Ha, well, I don’t know about that — but your comment is very sweet. Thank you. 🙂 🙂

  • This looks amazing! At first, I thought I wouldn’t benefit from this tutorial since I don’t have InDesign but it looks so great, I’m definitely saving it! Maybe I’ll be able to master Microsoft Publisher and do something like this! Thank you!

    • Ooo, yes, Microsoft Publisher is another great alternative to InDesign! Years ago I used to design lots of things in Publisher. It can have issues when it comes to printing at professional printers (for some reason sometimes the PDFs don’t translate well), but for regular home printing it’s usually pretty good. Thank you for your comment!

  • Ya know what? I am quite literally in the middle of creating my own blog post on how to create fab digital downloads! I love this post. It makes me wish that I had Adobe InDesign (which I don’t) haha! I’ve been using Apple Pages though, which works for me. But yeah, this post is chalk full of how-to goodness! <3

    xoxo
    Allison
    http://www.wonderlass.com

    • Apple Pages is a fab alternative, Allison! I can’t wait to read your post on creating digital downloads, girl. 😀

      • Dammit why can’t we live closer? I feel like we’d get along really well and we could geek out over blogging + biz over coffee! 😛

  • Thanks so much for this, Erika!! I’ve been using Photoshop to make my worksheets since it’s the program I have most experience in, but I’m thinking that I really need to give InDesign another chance. Seems like it’s a lot easier to keep text aligned and consistent. I tried it out not too long ago and felt a little overwhelmed, so I scurried back to PS haha. This tutorial looks so easy to follow, though. Thanks for taking the time to outline each step. Much appreciated. 😀 Off to go play with InDesign some more!

    • Oh my YES, it is easy to get overwhelmed with InDesign (or any new Adobe product, really — they are so robust that the options can be mind-boggling)! I agree that it is DEF easier to keep text aligned and consistent with InDesign vs. Photoshop. I love it for that reason alone. I’ve been considering adding more ID tutorials to deal with placing images and graphics, etc., for people if they’re interested. Once you get the basics down, ID is actually pretty simple!

      • I’d TOTALLY love to see more ID tutorials 😀 This one alone helped so much already!

        • Alana

          Please please please would love more of these ID tutorials

  • Ashley

    Hi Erika! Thank you for the awesome post - I can’t wait to practice! I’m actually weighing the Adobe products right now to determine which is best for me to purchase - would the above tutorial work for Photoshop as well or involve a similar process or is InDesign substantially better for creating worksheet type items? Thank you!

    • Ashley, thanks for the question! Photoshop is going to work quite a bit different from this tutorial — it’s purpose is really for photo editing and graphics, so most of its features revolve around manipulating images rather than laying out text. That said, you could definitely still use it for worksheet type items — it just won’t be as intuitive as InDesign (and you won’t have all the layout options, smooth setup of multiple pages, etc).

      If you’re only looking at purchasing a single-use Adobe CC license (for one piece of software), I would look at how much you would use Photoshop vs. InDesign for your needs. If most of your work is going to revolve around image creation, it definitely makes more sense to go with Photoshop and either use it to create some worksheets or use a different program like Apple Pages, Microsoft Publisher, etc. to make worksheets/ebooks/etc. But if image editing isn’t high on your list and your focus is more on creating digital info products, I think InDesign is by far the superior piece of software.

      Hope that helps a little. 🙂

      • Robin Walthour

        Thank you Erika for the above detailed response. It was a question that I had in mind regarding Photoshop vs InDesign. I use Photoshop and Apple Pages. But we can never learn too much. The InDesign tutorial is verry much appreciated!

  • Thanks for the awesome post!! I’ve been in process of trying to learn InDesign to design a planner and this was very helpful. I especially appreciated the tip about what quality to choose when printing. Have an awesome day!

  • Omg yay! I haven’t used ID in YEARS and have been afraid to get back into it. Soooo so glad you’ve posted this because I’ve been wanting to use it again for this very purpose. Thank you Erika!

  • Lisa Mellon Wagner

    Super tutorial! I was admiring some worksheets on Teachers Pay Teachers and asked what programs she used (Laura Randazzo, fyi) and InDesign was one of the programs. I downloaded the free trial and then was exceedingly overwhelmed. Your tutorial helped me see that I can leaern it bit by bit. Thank you!

  • TracyMichelle

    Thanks for this wee tutorial Olyvia - really clear and easy to follow … I’m very proficient at both Powerpoint & Publisher and have been testing out the switch to InDesign … it’s been slow going compared to my creation speed on the other two programs but I think it will be worth it in the long run. As I’m just gearing up to create my eBook - this tutorial was very timely to help me get it done. Thanks for all your awesome work xoxoT

    • I’d love to know how it’s going with creating your eBook and whether this tutorial has proved at all helpful since then! I hope all is going well. 🙂

  • tiffanyima

    Quick question!

    First of all this post is so great! Do these instructions allow for fillable boxes on the worksheet, so that people can fill it out on the computer?

    • No they don’t! But here’s how to do that:

      After you’ve drawn the rectangle box InDesign, select it and go to Object in the menu bar.
      Then go Interactive >> Convert to Text Field.

      This will make the box fillable on the computer — just be sure to Export as Adobe PDF (Interactive), not Adobe PDF (Print).

      • tiffanyima

        Thanks so much, Erika! Super helpful post and direction 🙂

      • tiffanyima

        Sorry to bother you again, but I have another question about this! When I exported the file, it was fillable but it was like a small box in the larger rectangle…than the rectangle disappeared when I started typing. Is there a setting I should change?

  • Molly Reynolds

    This is fantastic, thanks for sharing! I have recently started using this software to have a go at creating my own brochures. Still finding my way around it, I did attend some beginners InDesign Training which really helped me initially. https://www.trainingconnection.com/indesign-training.php

  • I love using indesign, probably because creating content for print is something I enjoy! You did a fantastic job on this indesign tutorial!!

    • I really enjoy it, too. 🙂 It’s relaxing somehow. Haha. Thank you, Leanne!

  • Chinye Oseji

    Loved this. Quick and simple. No Muss.. no fuss. Now I just need to figure out how to change the portrait orientation. Thanks!

  • I use Apple Pages right now. Any particular advantages of using InDesign vs. Pages? Priyanka | socialmediawithpb.com

  • You are a-mazing! Thank you! I am inlove with your site!

  • Lisa

    Love this! I’m just learning InDesign today using Skill Share. Question - I was looking for the “Column” and I could not find it. I’m using Adobe Creative Cloud.

    • Lisa

      OK - I figured it out. I think you need to add a note in your step that you have to highlight the text box using the mouse thing for it to pop up. I didn’t know I had to do that. Thanks!

  • Lisa

    I think I’m doing something wrong in Step 10. I’m trying to create a box underneath my blog name. When I use the eye dropper into the shape, it turns that whole area the color and not just the little design. Not sure how to fix that.

  • Excellent tutorial. I love post with tutorials like this. It really does help a lot.

  • Ash

    So much gratitude, this was extremely helpful in getting started for my ecourse designing! love

    Ash
    http://theawakenedstate.net/

  • karol Wickert

    Hi Erica, Thank you, this is what I’m doing right now and found your blog while searching. One question, we are having a family math night with activities and was wondering if I can create math questions in Indesign, convert to PDF and have parents and their kids fill in the answers to the questions online on their smartphones. (No need for printing) I know this is beyond the scope of your blog, but you may know! I heard of fillable forms in Acrobat, We have the DC version. Thank you so much.